Sunday, December 13, 2009

Bake-A-Long #6: Classic Carrot Cake


I decided this week to keep it simple. Since I wasn't making this cake to take anywhere, I halved the recipe and made it in a 9x9 Pyrex pan.
This is only the second carrot cake I have ever made, and I'm not sure why because with the aid of a food processor, they are simple to mix together, pour into a pan and bake, and who doesn't like carrot cake?
This recipe and the Baking Illustrated version I made previously were very similar. Rose's recipe however calls for only cinnamon while the other uses cinnamon, nutmeg, and cloves.


I didn't bother with pulling my mixer out, I mixed everything by hand. The dry ingredients were blended, sifted, and set aside, and the wet ingredients were mixed with a spoon.


The dry ingredients and then carrots were mixed into the batter and then poured into a greased Pyrex dish.


When I went to make the Creamy Dreamy White Chocolate Frosting, I realized that I some how didn't make it home with the two bars of white chocolate I bought at the grocery store that day. However, I had a partial bar left over from the Lemon Luxury Cake. Since I halved the recipe, this partial bar was enough to get by with. I did add a little powdered sugar at the end to sweeten it up a bit since I was short on the white chocolate.
I was surprised by the strong white chocolate flavor. When I tasted the frosting fresh from the food processor, I only detected the white chocolate flavor which overpowered the cream cheese. However, once the frosting sat, the white chocolate seemed to mellow and the resulting flavor paired well with the cake.


The end result was a moist, homey cake with a lovely balance of spice and sweetness.


Sunday, November 29, 2009

Bake-A-Long #5: Pure Pumpkin Cheesecake


I wasn't going to participate this week. I had tried this cake a few weeks ago when my coworker made it and knew that it was very good, but my sister was already making a pumpkin cheesecake for Thanksgiving so I didn't think we needed two. However, Matt decided that he wanted to make this for his family's Thanksgiving dinner, so that's what we did.


We could probably nickname this cake the Pure Pumpkin "Recipe for Disaster" Cheesecake because we had several "oops" moments during construction. The first mistake was with the crust. I poured out the pecans onto a baking sheet for toasting without measuring, as I knew we would need some extra for garnishing. However, it was not me that started processing the pecans for the crust, it was Matt, and he just poured them all in thinking they were already weighed. So, when the pecans, gingersnaps, and butter were all processed together, we had a soupy mess. I then realized that he had used all of the pecans. I would guess that all of the pecan oil is what made the crust really liquidy. To thicken it up, we added a significant amount of ground gingersnaps. This seemed to work OK.
After this, the pumpkin and turbinado sugar were cooked and then processed with the cream, egg yolks, and cream cheese and baked in a water bath as indicated in the recipe. The cake looked good when it was finished baking (I forgot to take a picture).
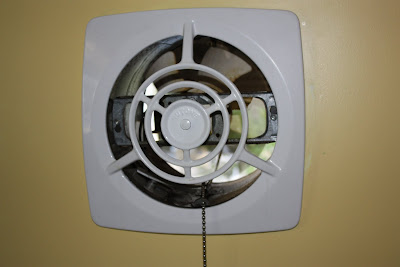
Thanksgiving afternoon, we made the caramel topping. This was mistake number two. It took three times to make the caramel successfully. The first time, I burnt it (there was not enough volume in the sauce pan to take an accurate temperature with my candy thermometer. Burnt sugar = smoke = good thing we have an exhaust fan above our stovetop.


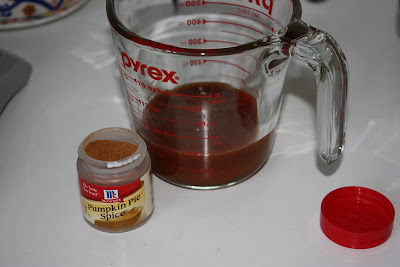
For our second caramel attempt, we decided to just stop cooking when the syrup began to brown and we also decided to add in some pumpkin pie spice since there were no spices in the cake itself. I though it would add a nice touch. So, when the sugars started to caramelize I took the syrup off the heat and dumped in some spice. I was a bit heavy handed when dumping in the spice and added more than I intended. We added the cream and butter and tasted the caramel to find that it was extremely bitter. I think the bitterness came from the excess spice and I also think I slightly overcooked the sugar.


So, third time was a charm. We didn't risk it by adding spice this time.

The cake turned out quite nice, but I think everyone was too full to fully enjoy it. I think the texture is the best part of this cake. Also, the extra gingersnaps in the crust turned out to be a nice touch, as the ginger flavor came through well. Matt had a piece for breakfast this morning. This leftover dessert for breakfast thing seems to be becoming a trend for this bake-a-long. But who wants to let a good dessert go to waste.


Sunday, November 22, 2009

Thanksgiving Bake-Off, Work Addition

Every year, a week before Thanksgiving, we have a "Work Thanksgiving" where everyone brings in a dish to share. This year, we decided to have a mini Bake-Off in conjunction with lunch. Four of use participated in this game with the winner earning the title "King of the Lab".

I debated for a few days on what to make. I thought about doing the pumpkin cheesecake from Rose's Heavenly Cakes, but my coworker who had borrowed my book decided to make that one. I wanted to do something somewhat easy since I only had Wednesday after work to make it. So after flipping through numerous cookbooks I stumbled upon the recipe for Chocolate Genoise with Peanut Butter Whipped Ganache. It did not look complicated, and the combination of chocolate, raspberry, and peanut butter sounded good, so that is what I went with. I will not go into details about the recipe, but it was a chocolate sponge cake brushed with a black raspberry syrup and topped with a chocolate peanut butter ganache. This was the first cake I have made that has a syrup soaking step, so I was slightly skeptical going in to this. But when I was done I was feeling more confident because I thought it looked pretty good.

The next day at work we had the following entries (one person entered 2 desserts, that's why there were 5 total):

Chocolate Peanut Butter and Jelly Cake
(given the raspberry and peanut butter, I thought that name would fit well)

Pumpkin Cheesecake

Sweet Potato Pie

Chocolate Strawberry Mango Crumb Bars

Black Forest Cake


I thought everyone did very well on their presentation.

When it came time for tasting, we cut a piece of each dessert and called in a few other judges. The judging went as follows: 3 points for first place, 2 points for second place, and 1 point for 3rd place. When the last "judge" was in the room tasting I peaked in to look at the score board. My cake had zero points. I pleaded for a sympathy vote and was given 1 1/2 points from the last voter. I guess that made me feel a little better.
I'm note sure what went wrong. The cake looked good, the texture was fine, it just had no flavor. When I brought the cake home afterwards (all but 2 extremely small slices remained) I made Matt taste it. He said it tasted like a fluffy omelette with a little bit of cocoa powder added. I agreed that it was not a very good cake. The raspberry syrup flavor was nonexistent and the chocolate flavor was very weak. I used a dutch process cocoa powder from King Arthur that I have used previously with success. The peanut butter ganache, however, was pretty good. The peanut butter flavor was subtle but definable. Although I lost, I learned that maybe sponge cakes are not for me, but that probably won't stop me from trying another one, but I know I won't be making this one again.

I will say that my vote went for the pumpkin cheese cake. It was extremely creamy and had excellent flavor. However, it tied for second place with the crumb bars. First place went to the black forest cake which was a chocolate cake baked with cherry pie filling and topped with cream cheese frosting.

Bake-A-Long #4: Catalan Salt Pinch Cake

I told the girls I was bring this cake to Sangria Night a few weeks back. But, after my recent sponge cake embarrassment I was kinda afraid to bring it somewhere untested. But since I already said that's what I'm bringing, I went ahead and made it.

I used whole almonds and toasted them for about 10 minutes.
I had already started the food processor when I remembered that I was supposed to grate them before processing to avoid oil seepage. Therefore, my almonds ended up more coarsely ground than what they were supposed to be. But texture is good in a cake, right?


No problems with the cake mixing. I ended up estimating the 2 tablespoons of egg per 2 minutes and realized about half way through that I was going to fast so slowed down to achieve a total mixing time of 20 minutes.


Since I was still worried about the flavor, I decided to go ahead and make a sweetened blueberry syrup and whipped cream to go on top.


And voila! There's the finished product. Like the last sponge cake, it looked fine, so, off to Sangria Night I went with the pinch cake, blueberries, and whipped cream. I of course had to taste it right when I got there to make sure it was serve-able. I cut a piece, warmed up the blueberries and put a dollop of whipped cream on top. My first bite was sans topping to get the full appreciation of the cake itself. It was much better than the chocolate genoise. The almonds and zest gave it nice flavor. I found it to be a pleasant, light cake good when for when you don't want anything to heavy. I even ate a piece for breakfast this morning. I mean, it's mostly almonds and eggs, those are breakfast foods to me.
Some of the comments I got from the girls were:
"It didn't even need the blueberries and whipped cream" and
"It's a hearty cake, it's good"

So, moral of the story is maybe sponge cakes aren't so bad after all.

Sunday, November 15, 2009

Bake-A-Long #3: Lemon Luxury Cake


Oh lemon curd, how I love thee, let me count the ways...
1. Butter
2. Lemon
3. Egg yolks

As individual foods, these may not be all that great to eat, but put them together and you get something quite tasty. That is why I made this cake. Well, that and the picture that accompanies the recipe (if only mine would have turned out that pretty). This cake requires multiple steps, none too difficult, but slightly time consuming. It is best to make it in stages. I made the lemon curd the night before to allow for the required cooling period. I always forget how long it takes to cook lemon curd when I'm making it. I had to keep telling Baxley the puppy "I'm almost done, try to hold it just a few minutes longer...". Thirty minutes later, I was done, and thankfully, he was able to hold it.

Sunday afternoon, I started the white chocolate custard for the butter cream. At first, I thought I may have gotten the white chocolate too hot when melting it with the butter, as it was grainy in appearance, but once I whisked in the eggs, everything came together. This was cooked to 140 F. It thickened slightly but was still fairly runny when complete.


While the custard was cooling, I baked the cakes. No surprises here, it was a straightforward recipe. The recipe called for superfine sugar, which is not available at my grocery store. The book suggests to lightly grind granulated sugar as a substitution. I skipped this step and used regular granulated sugar. My only problem was that I think I slightly over baked the cakes. While the cakes were cooling, I made the buttercream. Buttercream, like the curd, also always takes longer to make than I remember (lots of mixing).


Matt, having more patience than me, volunteered to cut the cakes in half and frost them. Thanks Matt, job well done. The lemon curd did not go all that far, we could have used a little more for filling.


I forgot to mention, I used Ghirardelli white chocolate for the cake and custard, as this is the only brand I could find, therefore, I did not have the vanilla seeds present in my frosting that the recipe calls for.

I will take credit for the final touch of lemon curd dots. Dots are the old standby for my amateur cake decorating skills.


Luckily, Ashlie the sister invited us over for dinner Sunday night so I had somewhere to bring my cake. It was enjoyed by all.


One note that I would like to make is, weighing the eggs does make a significant difference. For both the curd and the cake, I had to add more yolk or whole egg than suggested to achieve the correct weight. This is the perfect cookbook to use as scale with, as all the recipes are given in volume and weight measurements. I highly recommend using one. It makes for less dishes too, which is very important when you don't have a dishwasher in your home!

I'm not sure if I would make this cake again. I do think I will test out using key limes instead of lemons in it one day. We planted a key lime tree in our yard this summer, so this will be added to the list of things to make with our key limes whenever the tree fruits. This ends my post on lemon luxury cake, as I have a piece in the fridge calling my name.

Monday, October 19, 2009

Bake-A-Long #2: Apple Upside Down Cake

This was my first upside down cake, and I have to say, this one is going to be hard to beat. The cake was melt in your mouth moist and the topping added the perfect amount of apple-y sweetness. Here is how I made it:

1. I used golden delicious apples, a variety I have never cooked with, but were recommended in the recipe.
2. I added 1 tsp of cinnamon to the caramel topping while it was cooking. I really like cinnamon, and thought about putting it in the batter, but wasn't sure if it would alter the texture, so I opted for the topping only.
3. I also used salted butter in the caramel topping. I thought a little saltiness might go well with the sweet.
4. I do not own a 9 x 2 in pan, so I used my 9 x 1.5 in pan. I was afraid the cake might rise to high, but it came out perfect.


I don't think I cooked the caramel long enough, but even so, the topping was yummy (it wasn't even soggy when I ate a piece for breakfast the next morning). I also did not use the walnuts or whipped cream. Next time I will give them a try.
Matt (my husband), who claimed to not like upside down cakes loved it too. He said he would like to make it again in a spring form pan, cutting the apples into small pieces and baking in between two layers of cake, topped with cinnamon streusel. If we ever make this, I'll let you know how it turns out.


This recipe is a keeper, and may just be my favorite RLB cake yet. The easy factor makes it even better. I wasn't sure I was going to have time to bake this weekend due to a new house guest running around (woof), but I'm glad I did.

Sunday, October 11, 2009

The Heavenly Cake Bake-Through: Barcelona Brownies


heavenlycakeplace


Overall, this was an uncomplicated recipe that took less than an hour to make. Instead of using the suggested financier molds, I baked mine in cupcake form. I yielded 12 cupcakes. I had to add about 5 more minutes to the suggested bake time as well. Also, instead of filling the brownies with the optional ganache, I topped them with it while it was still slightly warm. Since the brownies did not rise over the liners, the liners provided a nice wall to hold in the ganache before it set up all the way.


The brownies turned out rich, chocolaty, and very moist. The texture was very appealing, being fudgy and cakey at the same time. The ganache, being bittersweet chocolate and cream, was of course, delicious too. This is definitely a recipe to be repeated. Due to the portability and attractive appearance, this would be a great dessert to bring to a party. I am picturing some gold glitter dust sprinkled on top next time.

Thursday, October 8, 2009

Lily's 4th Birthday Cake


This cake was made for my niece Lily's 4th birthday.  Lily is my sister Ashlie's daughter.  Lily had a few strict requirements for her cake decorations.  She wanted:

1.  Hearts
2.  1 Rainbow
3.  A white My Little Pony

A white My Little Pony figure was included, it was put on top at the last minute.  I think she approved. 
The cake was an old fashioned white cake, filled with 7 minute frosting and iced with cooked flour frosting.  Although I like to use the 7 minute frosting because it is easy and looks cool when you burn it with a blow torch (it browns like marshmallows), I would probably not fill a 2 tiered cake with it again because it slides.  The 6 inch cake on top was dyed with gel food color and each layer was baked individually in 6 inch pans.  The hearts were made from gum paste.  No recipe this time, just wanted to share some birthday cake fun.


Wednesday, October 7, 2009

Maple French Toast and Bacon Cupcakes

 
I made these cupcakes for the August Martini Club.  I am drawn to bacon and the whole sweet/salty combo, so I thought I'd give them a try.  I think the other girls were slightly afraid of them, but everyone gave good reviews.  The texture was more muffin than cake like.  The bacon flavor was lacking.  The cinnamon cream cheese frosting was the best part of the cupcake. I would make the frosting again, but probably not the cupcake itself.  
I followed the recipe as is, no changes.  I'm still into the idea of bacon desserts, and one of these days I'm gonna bake some bacon chocolate chip cookies.  I'll let you know how they turn out.
Posted by Picasa

Sunday, June 7, 2009

Monte Cristo Sandwiches and Fried Mushrooms


I thought I would make use of the left over batter and make fried mushrooms to go with the sandwiches, onion rings would have been good as well. We made just one sandwich and split it, they are really huge.
Ingredients:
Oil for frying
1 cup water
1 1/4 cup flour
2 eggs
2 1/2 tsps baking powder
1 tsp salt
For each sandwich
3 slices bread
1 slice american cheese
1 slice monteray jack cheese
2-3 slices turkey
2-3 slices ham
Confectioners' Sugar for dusting
Raspberry Jam (optional)

Heat the oil. While the oil is heating, make the batter. In a medium bowl combine the flour, baking powder, salt. Whisk the egg and water together and then add to the flour mixture.
Butter the insides of each piece of bread, one piece will be buttered on both sides. Place 1 piece of bread, butter side up, add american cheese, turkey, bread buttered on both sides, monteray jack cheese, ham and last piece of bread butter side down. Now put 4 toothpicks in each quarter of the sandwich. Cut into quarters.
Dip each sandwich quarter in the batter so that all sides are coated. Deep fry in hot oil until golden brown on all sides. If using small amount of oil just turn the sandwich over on each side. Remove toothpicks, arrange on serving tray, dust with sugar and serve with raspberry jam (ask Matt about that part).
For the mushrooms, we just dipped them in the batter and tossed in the hot oil for a few minutes. The sandwiches stay so hot, you have plenty of time for these to cook without the sandwiches getting cold. Of course we did a few before we cooked the sandwiches so we could eat them while we cooked.
Super easy, probably takes 30 mintues total with clean up!


Monday, April 27, 2009

Doughnut Muffins

No, not yeasty donuts, the cake kind. I know, a little bit of a disappointment, but still good, and a lot less time consuming to make. Also, since it's in muffin form, don't you feel better about calling it breakfast?


Donut Muffins
Recipe from The Joy of Cooking

For the Muffins:
2 cups all-purpose flour
1 tbsp baking powder
1/2 tsp baking soda
1/2 teaspoon salt
1/4 teaspoon ground nutmeg
2 large eggs
1 cup yogurt, buttermilk, or sour cream
2/4 cup sugar or packed brown sugar
4 to 8 tbsp (1/2 to 1 stick) warm melted unsalted butter
1 tsp vanilla

For the Topping:
1 stick butter
1/2 cup sugar
1 tsp cinnamon

Preheat oven to 400 F. Line a 12 muffin pan with liners.

Whisk together in a large bowl: flour, baking powder, baking soda,
salt,and nutmeg.

Whisk together in another bowl: eggs, yogurt (or buttermilk or sour cream), sugar, butter, and vanilla.

Add wet ingredients to dry ingredients and mix just until dry ingredients are moistened. Do not overmix, the batter should not be smooth.

Divide among muffin cups and bake 12-15 minutes, until a
toothpick comes out clean.

While the muffins are baking, melt your butter and blend together your sugar and cinnamon for the topping.

As soon as the muffins are done, dip them 1 at a time in the melted butter and then roll in the sugar mixture.


Oh, and if you plan to eat them the same day you bake them, you can get away with using the lesser amount of butter, but if your gonna hold on to them for a few days, go for the full amount.


Sunday, April 19, 2009

Yummy in my Tummy Strawberry Cake


This one is for you Matt! This is an easy and yummy recipe for strawberry cake given to me from a friend from bible study.
For the cake you will need:

1 box of white cake mix
1 pack chopped frozen strawberries
1 box strawberry Jello
3/4 cup of vege oil
4 large eggs
1/2 cup water
2 tablespoons of flour

Combine cake mix, Jello,
oil, flour and water and mix in electric mixer. Add in eggs one at a time then stir in half of the pack of frozen strawberries. Pour mixture evenly into 2 round baking pans. Bake at 350 (or use time recommedations on cake box).

For cake icing:

1 cup butter
2 lbs. powdered sugar, sifted (I actually used 1 and 1/2 lbs. and had plenty of icing)
the other 1/2 of the frozen strawberries

Beat room temp. butter on medium speed with an electric mixer for 20 seconds or until fluffy. Add powdered sugar and chopped berries, beating at low speed until creamy. You can add more sugar if frosting is too thins or more berries if too thick. I did not try this, but I think if you sing the Beatles tune Strawberry Fields Forever while making this cake it may actually turn out better. Just a thought...
Frost your cake ans she's ready to eat! Oh, and I garnished my cake with fresh strawberries and a mint sprig.

Wednesday, April 15, 2009

Carrot Cake, Easter Syle


Yes, Easter is old news, but substitute stencil of your choice and make for any occasion. Or, if you do not have an artistic husband who can draw Easter bunnies on demand, skip the picture all together...it is carrot cake, it's good on it's own.


Carrot Cake with Cream Cheese Frosting
Recipe from Baking Illustrated
Serves 10-12

Cake
2 1/2 cups (12 1/2 ounces) unbleached all-purpose flour
1 1/4 tsp baking powder
1 tsp baking soda
1 1/4 tsp ground cinnamon
1/2 tsp freshly grated nutmeg
1/8 tsp ground cloves
1/2 tsp salt
1 pound (6-7 medium) carrots, peeled
1 1/2 cups (10 1/2 ounces) granulated sugar
1/2 cup packed (3 1/2 ounces) light brown sugar
4 large eggs
1 1/2 cups vegetable oil

Cream Cheese Frosting
8 ounces cream cheese, softened but still cool
5 tbsp unsalted butter, softened but still cool
1 tbsp sour cream (I used yogurt)
1/2 tsp vanilla extract
1 1/4 cups (5 ounces) confectioner's sugar

Preheat oven to 350 degrees. Spray a 13 by 9 inch
baking pan with nonstick cooking spray.

Whisk together flour, baking powder, baking soda, spices, and salt in a medium bowl.

In a food processor, shred the carrots (you should have about 3 cups); add the carrots to the bowl with the dry ingredients. Wipe out the food processor and put in the metal blade. Process both sugars and the eggs until frothy and combined, about 20 seconds. with the machine running, add the oil in a steady stream. Process until the mixture is light and colored and well emulsified,
about 20 seconds longer. Scrape into a large bowl.

Stir in the carrots and dry ingredients until no streaks of flour remain. Pour into prepared pan and bake until a toothpick comes out clean, 35-40 minutes, rotating the pan halfway through the baking time. Cool to room temperature, about 2 hours.

To make the frosting, process the cream cheese, butter, sour cream, and vanilla until combined, about 5 seconds, scraping down as needed.
Add the sugar an process until smooth.

As you can see below, we taped dried spaghetti to the bunny outline, which was drawn on regular paper, for support. We then placed two noodles over the pan and laid the paper over the noodles so that they would not touch the icing. We then sifted ground cinnamon over the outline.


Are you impressed? I was.

Tarragon Egg Salad Sandwich


So Friday when I got home, I really wanted an egg salad sandwich. Just kidding. But really, I had never made an egg salad sandwich and didn't really understand why people made them. But, I had some eggs, some tarragon left over from another recipe and stumbled upon a Gourmet recipe for Tarragon Egg Salad. So, I thought I would give it a try.

Egg Salad
Gourmet via epicurious.com
Serves 6

8 large eggs
1/2 cup mayonnaise
3 tbsp finely chopped shallots
1 1/2 tbsp chopped tarragon
2 tsp white wine vinegar
1/4 tsp salt
1/4 tsp pepper

To hard boil eggs, cover with cold water by 1 in in pot and bring to a boil. Cover, take of heat, and let sit for 10 minutes. Drain, rinse with cold water, and then let sit in ice water for about 5 minutes.
Peel eggs and chop.

Stir eggs with remaining ingredients. Put between 2 slices of bread and dress with lettuce if desired.
The egg salad can be refrigerated for up to 1 day.

I have to say that I was quite impressed. For eggs and mayo, this sandwich was delicious. I might actually wake up one morning craving one. And maybe that morning all also learn not to delete pictures from my camera before I make sure they have uploaded. But no, I'm not bitter.

Tuesday, April 14, 2009

Bacon and Asparagus Quiche


The best part of quiche is that you can use whatever you have in the fridge to make it and the base of it: eggs, milk, and cream, I always have on hand so it often becomes dinner when a visit to the grocery store is past due.


For this quiche I used eggs fresh from the sister's back yard,


Oscar Mayer natural (no nitrates added) bacon,


parmesan cheese (BelGioioso is my favorite brand),


and asparagus (straight from Mexico, courtesy of Publix).


Bacon and Asparagus Quiche
Recipe adapted from
Baking Illustrated
Serves 6-8

1 pre-made pie crust
8 slices bacon
2 large eggs plus 2 large egg yolks
1 cup whole millk
1 cup heavy cream
1/2 teaspoon salt
1/2 teaspoon ground white or black pepper
1 cup grated parmesan cheese
a few hand fulls of asparagus, trimmed

Pre bake pie shell at 375 F until slightly browned.
While pie crust is baking, cook bacon in large skillet over medium heat, until crispy. Remove bacon onto paper towels. Pour off all but 1 Tbsp of bacon grease. Add asparagus to the skillet and cook over medium heat until crispy but still firm,
about 7 minutes.

Meanwhile, whisk together the eggs, egg yolks, milk, cream, salt, and pepper.
Crumble the bacon into bite sized pieces onto the bottom of your pie crust.
Add parmesan and asparagus. Lastly, pour the egg mixture into the pie.

Bake until light golden brown and a knife blade inserted about 1 inch from the edge comes out clean and the center feels set but soft like gelatin, 32 to 35 minutes. Transfer to a rack to cool. Let cool for at least 15 minutes before slicing.